
Today I decided to post an easy tutorial on how to make some basic retouches to photo's using Photoshop.
Here is my photograph that I will be editing today...This is from a couple years ago, my beautiful cousin let me do a fake photo shoot to build up my portfolio a bit. She is gorgeous as is, but there was a few things with this picture I wanted to adjust, so I will walk you through those. These simple adjustments can be used for any portrait, and really make a huge difference.

First of all, this photo is a little faded looking to me, and i would like to make the contrast a little better, as well as making the colors pop a little more. To do this, go ahead and duplicate your photo in photoshop by going to Layer> Duplicate Layer. I always do this because if I dont end up liking the changes i made, i can just delete the layer and my original copy is preserved.
Next, I would like to adjust the contrast of the photo. There is a few ways to do this, but my favorite method is using curves. To adjust the curves, you can go to Image > Adjust > Curves
There is some shadowing covering her face that I would like to remove. In curves, when I did my normal method to adjust contrast, it just made the shadows worse. I ended up using curves as a way to eliminate the shadows covering her face. To achieve this, I just raised the point in my curve higher to lighten the photo, and eliminate the shadows.
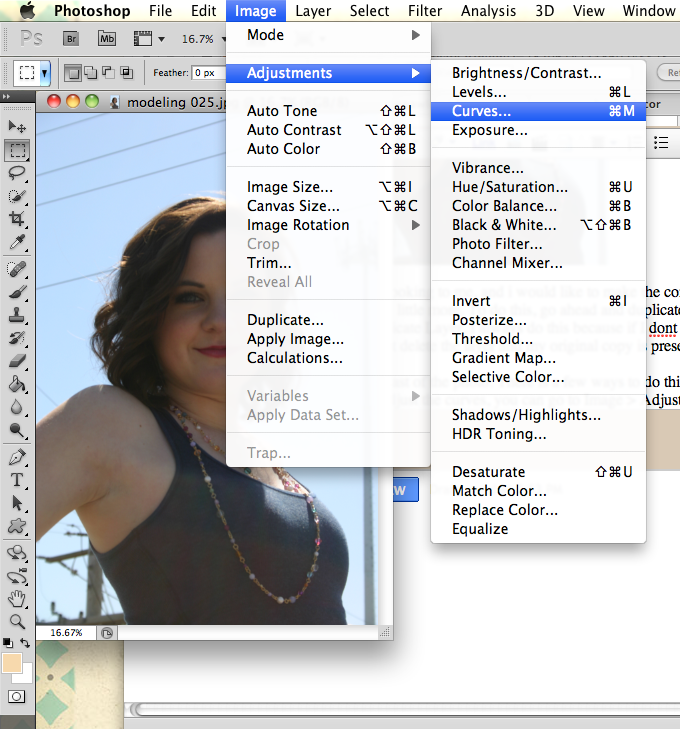

That fixed the shadows on her face, but it didn't do much for the contrast I was trying to achieve. What I am going to do now is use the Brightness/Contrast tool to finish up and get that nice contrast. To do this, go to Image > Adjustments > Brightness / Contrast


This will bring up a little slider tool. In order to get some nice contrast, the sliders of brightness and contrast should be drawn opposite from each other instead of towards one another. The brightness was fine for me in this picture, so all I did was bring up the contrast slider which gave Sara some definition, so that she didn't just kind of blend into the background.
The next thing I wanted to do with this photograph was up the saturation a bit to make the colors pop. To do this, go to Image > Adjustments > Hue / Saturation.
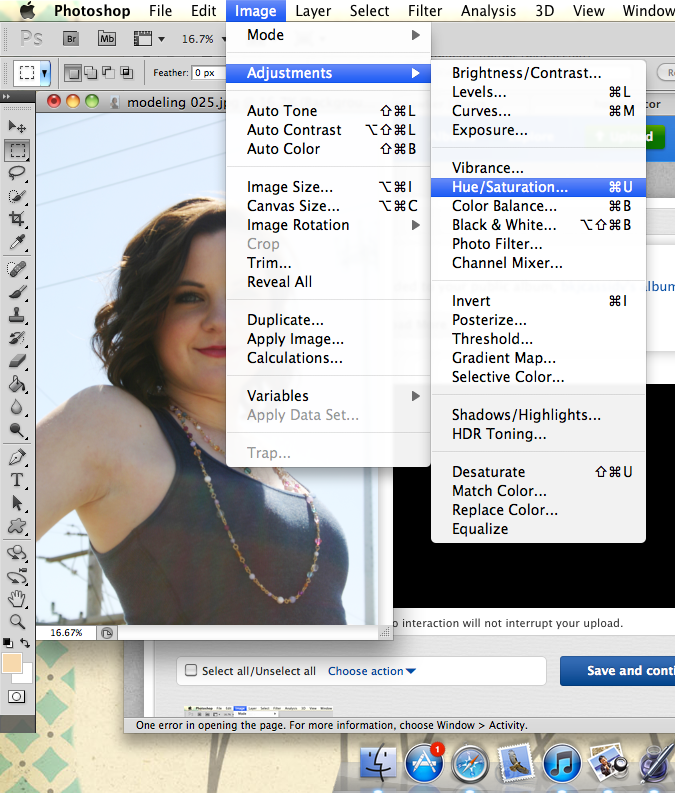
This will bring up yet another slider that has options to adjust the Hue of the photo, the Saturation and the Lightness. I normally dont do much with the Hue or the Lightness. The Hue tends to make the skin color look abnormal, and lightness is usually fixed with the curves tool. In this photo I boosted the saturation just slightly to really bring out the blue in her outfit, and the red lips.

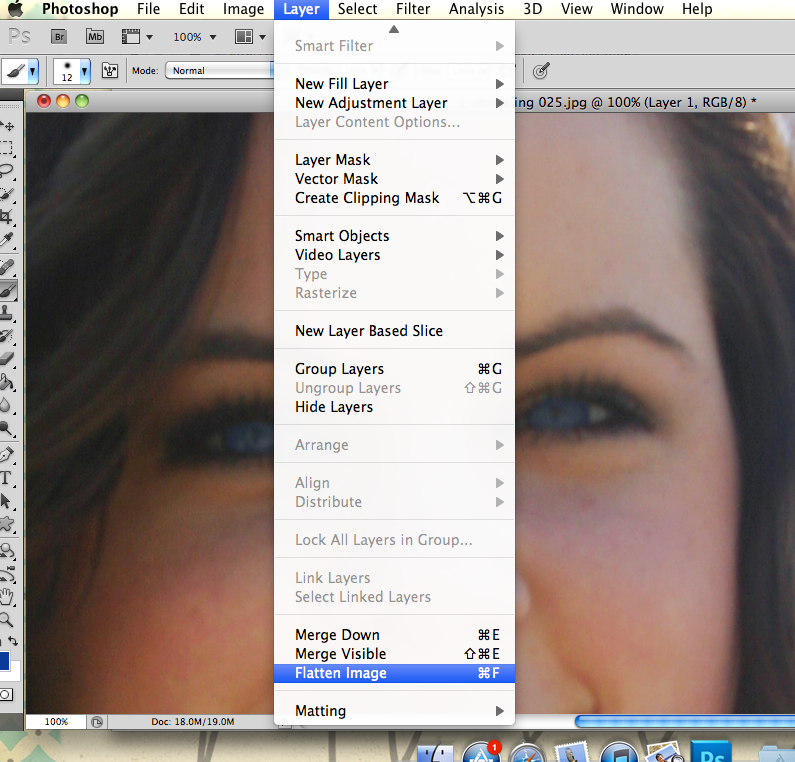
Next I Flattened my image, what this does is merge all your layers into one. If you are satisfied with your adjustments, you can go ahead and flatten your image to merge everything together. I tend to do this throughout editing, or just at the end because it converts the photo back into JPG.
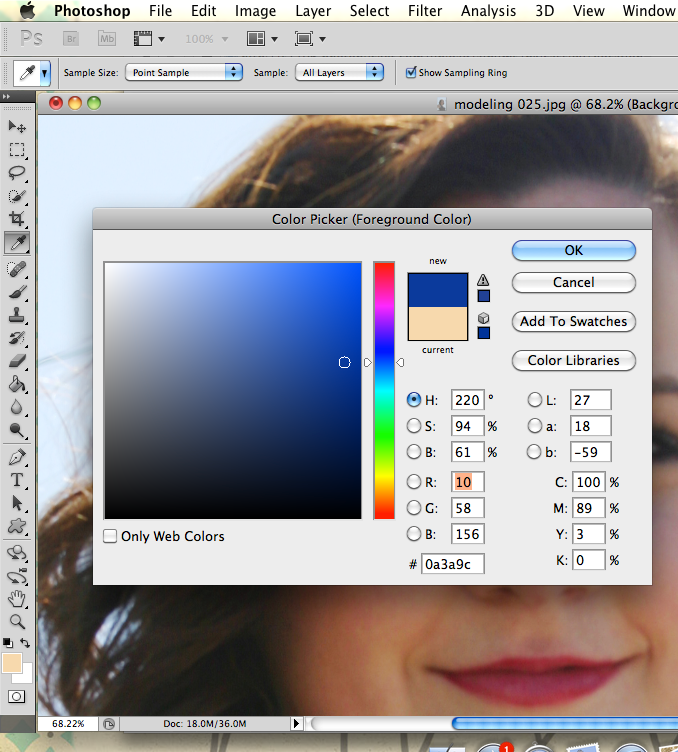
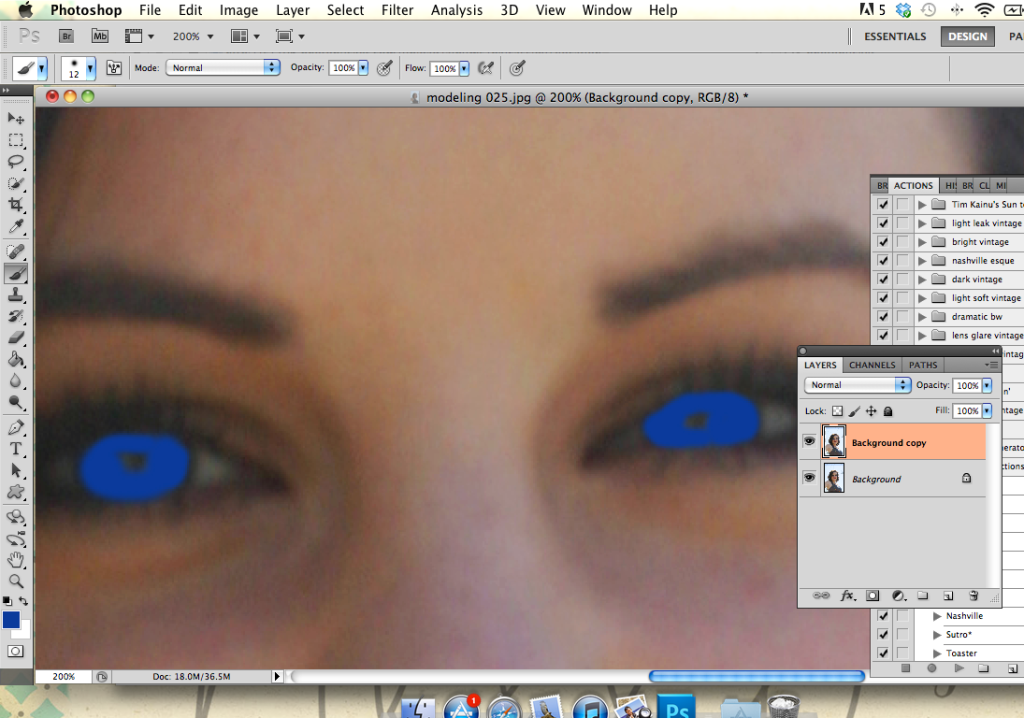
The next thing I would like to do to this picture is brighten up the color of Sara's eyes. Her eye color is a beautiful blue, but due to the lighting in the picture it just didn't show through. No problem though, I can always use the magic of photoshop to intensify and brighten her beautiful eyes.
Go ahead and duplicate your layer again.

Click on your color palette and choose a color that would intensify your subjects natural color. I chose a nice soft blue for Sara's eyes
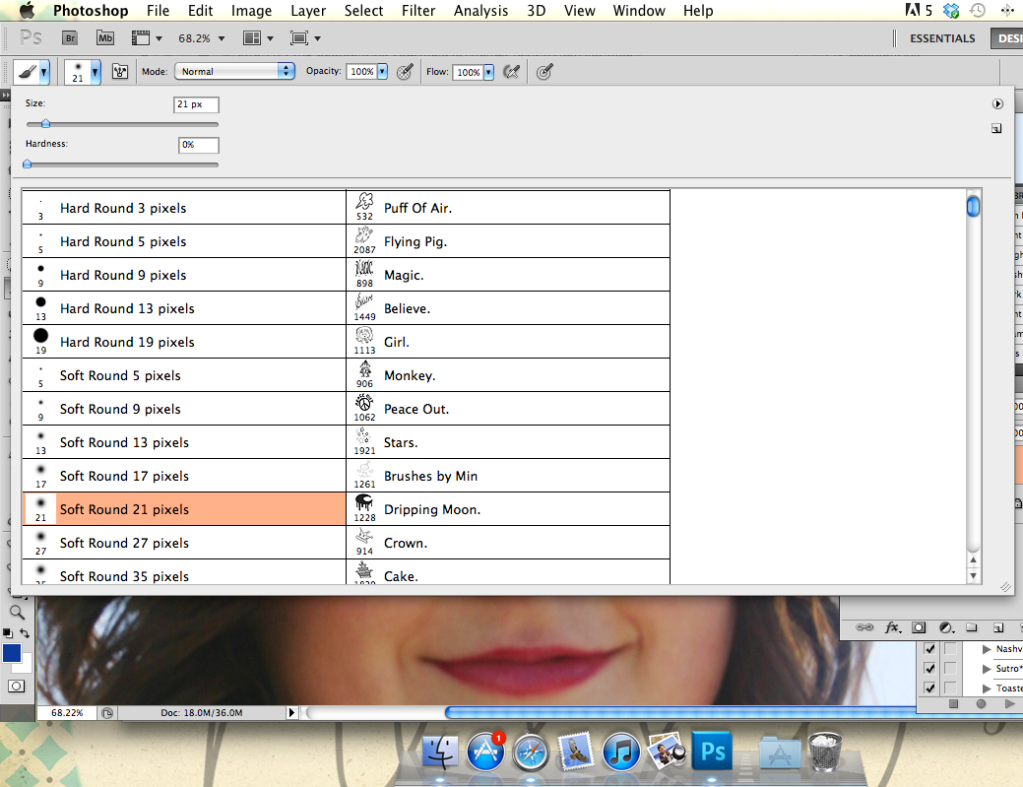
Go ahead and choose your brush size and hardness. I usually choose a softer brush, and then zoom in really close to my subjects eyes before choosing my brush size.
Go ahead and paint over your subjects eyes...Yes its going to look funky, but trust me, we arent quite done yet!
Now you will adjust the opacity of the layer until your eye color looks more natural, but still pops.

See how that made Sara's eyes pop just a bit while still keeping their appearance natural? Go ahead and flatten your image once again.
The next step is to brighten up her eyes a little to really make them sparkle. To do this, we are going to be using a method called "Dodging and Burning". We will be just using the dodging tool. Dodging is an old film technique used to brighten and enhance features, where as burning was used to darken and add detail. I like to use this technique once in a while. but i feel like it works especially well with brightening the eyes. To do this, go ahead and set your foreground color to white.
Next, you will need to create a new layer.

When the new layer box pops up, you will need to make some minor adjustments. First, go ahead and choose the blending mode as overlay for your new layer.

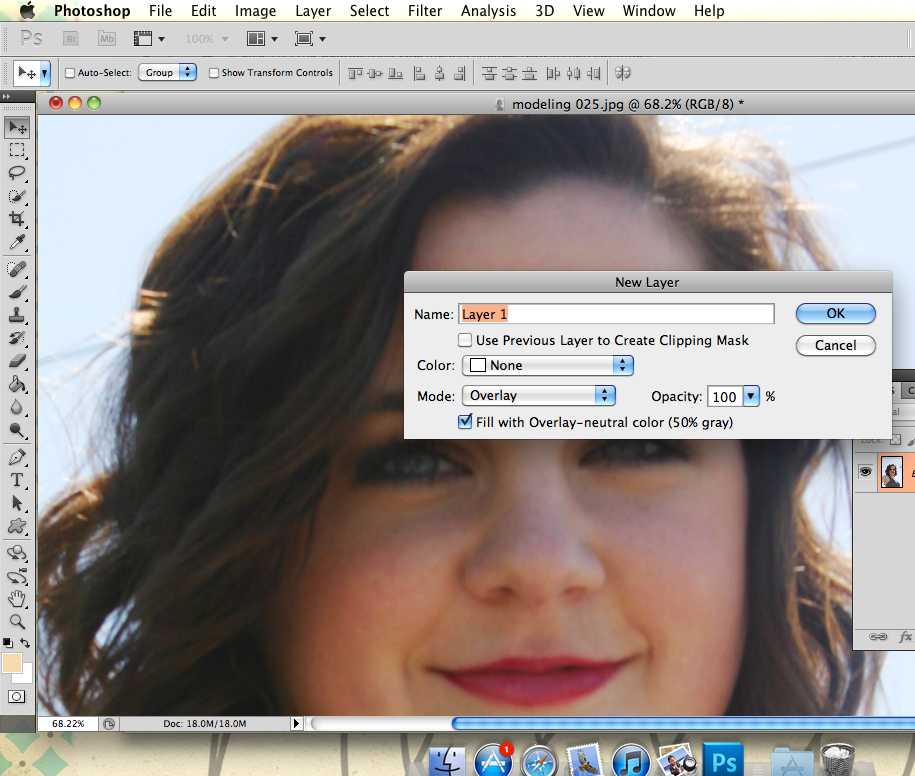
Next, be sure to check the "Fill with overlay neutral color- %50 gray" When using dodging and burning, you will always need a new layer with these settings. Since we are using dodging, to lighten, the foreground color should be white. If we were to use burning, to darken, the foreground color would be set to black.
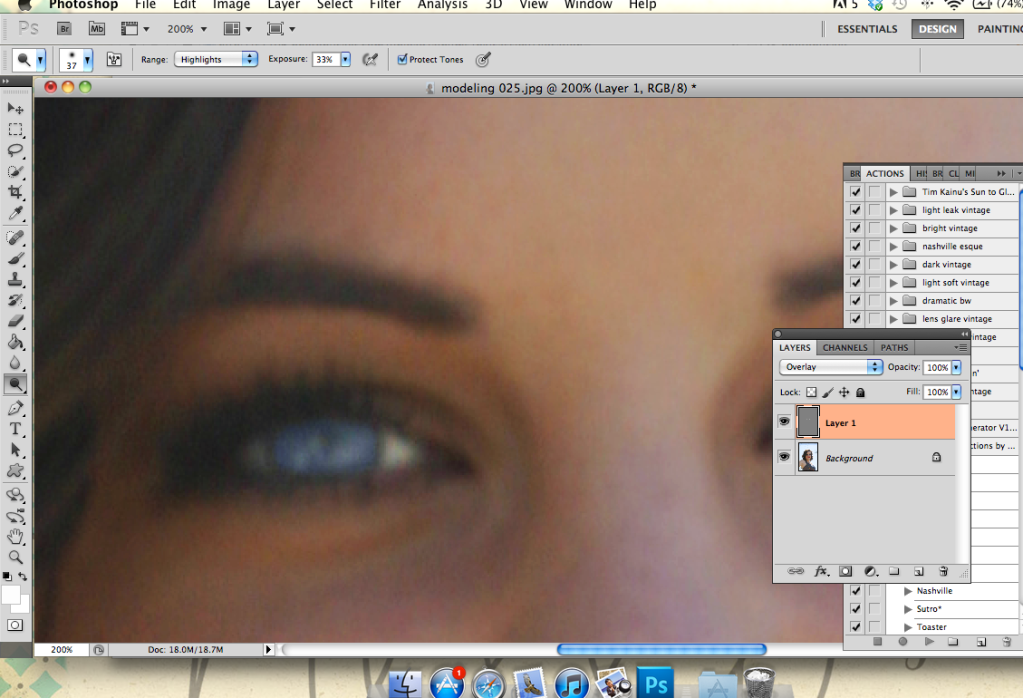
Select your dodging tool (which is a little magnifying glass). This will bring up a brush, go ahead and adjust the hardness and opacity according to your own preferences.
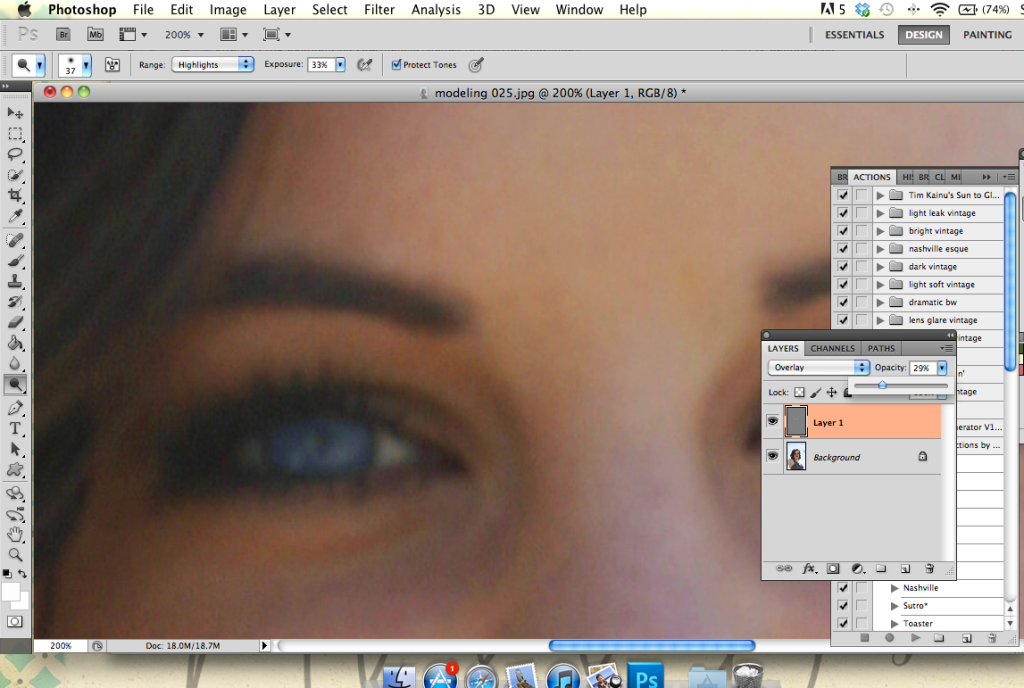
You will then go ahead and brush over the whites of the eyes, and the iris as well to brighten. This looked a little harsh on my subject, so I went ahead and adjusted the layer opacity until I got a nice, natural look.
Now, I would like to soften the photo up a bit as I feel this effect looks really nice with portraits. It gives the skin and softer and more flawless look to it. I dont like to do to much, as I feel too much of this effect will give the photo one of those corny portrait looks. Just a slight amount of softening works great, remember, less is more when it comes to photo editing.
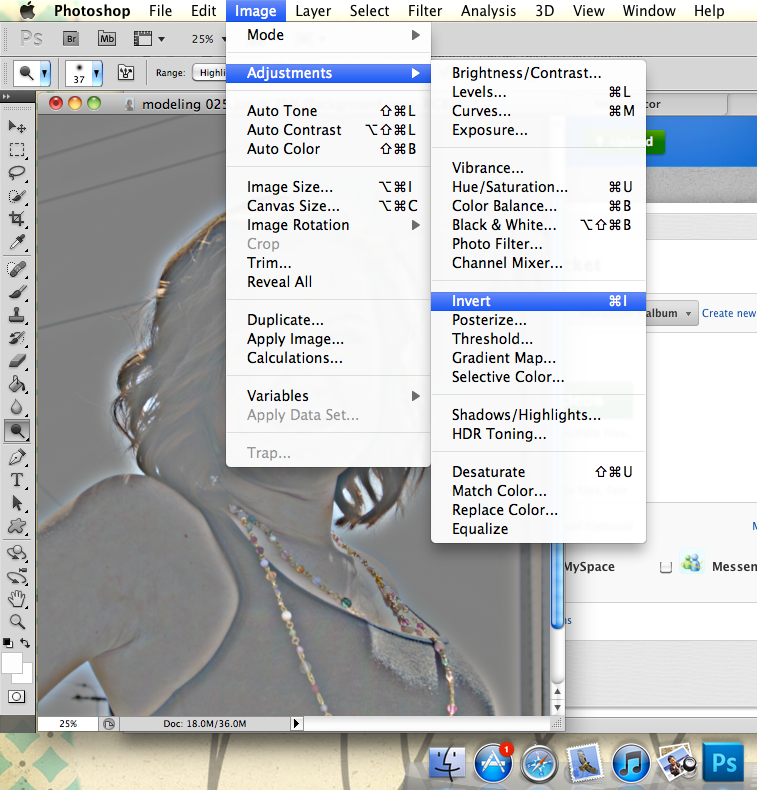
To soften the photo, I am going to duplicate my main layer. Then we will first be working with a photo filter, High pass. To use this, select, filter > other > high pass. Move the slider up and down accordingly, It will look dramatic, but the more dramatic your high pass setting is, the more softness it will add to your picture. Remember this when adjusting the slider, this helps deciding how far up or down you will go.

Next, go ahead and invert the image. To do so, image > adjustments > invert
Yes, it looks funky but now we will use our final step to add the nice soft effect.
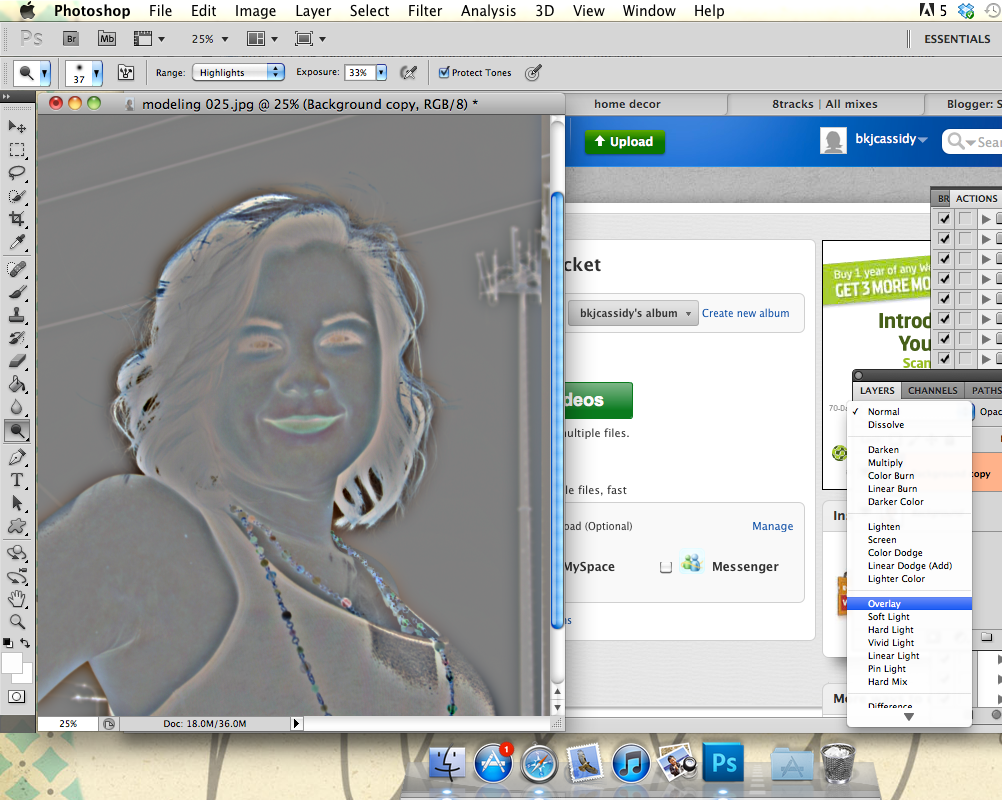
Select the duplicated layer, and change the blending mode to overlay. This changes the photo to the soft effect

I made my high pass settings a little too high on this photo, so i have an overly softened picture. I don't want the effect to be this strong, so to easily fix this I adjusted the opacity of the layer. After you have made the proper adjustments, I always recommend to use the eraser tool and go over the eyes and the lips. You want those details to really stand out, not to be softened because this makes the photo appear a little unnatural.


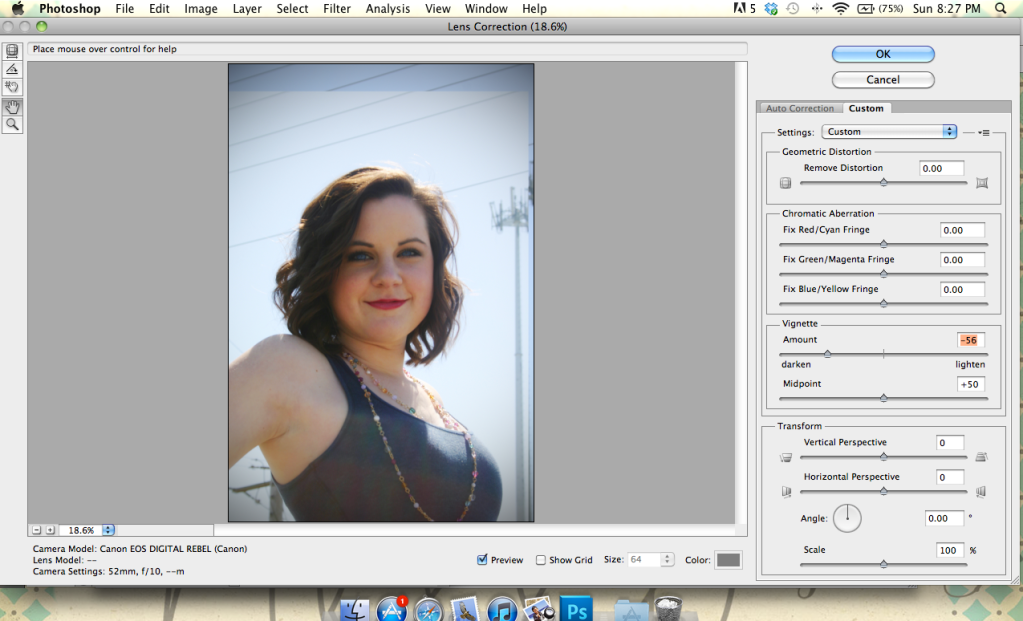
Lastly, I always like to add a slight vignette to my pictures because it adds depth to the picture. To do this go ahead and choose the filter "lens correction". Filter > lens correction

A window is going to pop up with two tabs. Go ahead and select the "Custom" tab, this is the one we will be working in. To adjust your vignette, adjust the slider under the vignette section. The amount slider determines how much of a vignette you want, and the midpoint slider determines how wide the vignette will go. I usually just use the amount slider unless I want a really dramatic effect.
Now go ahead, close this window and flatten your image. Voila! Now you have a nice portrait photograph. When comparing the two, you can see what a difference a few simple adjustments can make!
|
| Before |
 |
| After |


0 comments:
Post a Comment